
14 Minutes Read
Solar Staging: How Imperial Outdoors Scales From 240 Watts to 1,240
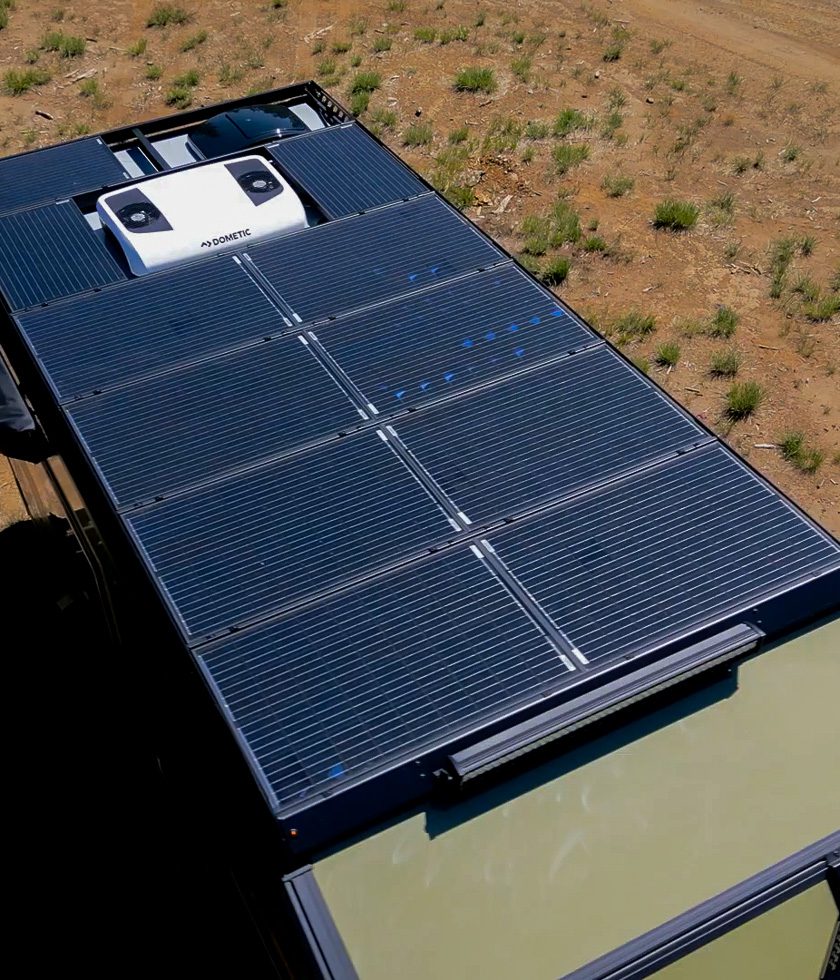
Every Imperial Outdoors Sport and Xplore trailer can be optioned with staged solar, and for 2027 the controller behind it changed on one series but not the other. The panels themselves haven’t changed at all, still Go Power monocrystalline modules with a 25 year warranty on both the 80 watt and 125 watt panels used across the lineup. What changed is how each array is managed. The Xplore series moves to a Victron SmartSolar MPPT 100/30, one per array. The Sport series moves to a newer Dometic built Go Power MPPT controller, also one per array, replacing the older Go Power GP-RVC-30-MPPT unit Imperial ran previously. Two different controller brands, same panels, same staging logic, and same reasoning behind why it’s built the way it is. Here’s the full breakdown: the panels, how they’re wired and mounted, why each series gets its own controller brand, and what the numbers actually mean for what you can run off the sun.
The panels: Go Power GP-PV-80M and GP-BF-125M
Stage 1 uses three Go Power GP-PV-80M panels. Stage 2 and Stage 3 each add four Go Power GP-BF-125M panels. Both are monocrystalline modules built with anodized marine grade aluminum frames and tempered low iron glass, and both carry a 25 year warranty, not a 10 or 12 year warranty like a lot of what’s out there on RV roofs.
- GP-PV-80M: 80 watts rated, 18.4V peak power voltage, 4.35A peak power current, 22.8V open circuit voltage.
- GP-BF-125M: 125 watts rated, 20.4V peak power voltage, 6.12A peak power current, 23.88V open circuit voltage.
Go Power tests these panels to withstand 1 inch hailstones at 51 mph, which matters more than it sounds like on a trailer that’s going to spend its life on gravel roads and under whatever weather a given trip throws at it. The panels are also built to pack more rated wattage into a smaller frame footprint than a lot of comparable panels on the market, which is part of why Imperial Outdoors can fit three 80 watt panels plus up to eight 125 watt panels on a single trailer roof without giving up walkable deck space or crowding the A/C unit, the bath vent fan, and the awning mount, the other hardware that also needs roof real estate.
Wiring the arrays, and why the roof mount matters as much as the wiring
Stage 1’s three GP-PV-80M panels are wired in series, which adds their voltages together rather than their currents. Three panels at 18.4V each works out to roughly 55V at the peak power point feeding the controller, and the summed open circuit voltage comes out to about 68.4V, comfortably inside both the Victron 100/30’s 100V input ceiling and the Go Power controller’s 96V ceiling, with real margin left over even after accounting for how open circuit voltage climbs as panel temperature drops in cold weather.
Stage 2’s four GP-BF-125M panels aren’t wired as one long series string. They’re built as two series pairs, two panels each, at roughly 41V per pair at the peak power point, and those two pairs are then wired in parallel to each other. That keeps string voltage low while adding current, and the whole four panel array lands on its own independent controller, separate from the Stage 1 controller. Stage 3, available on the X-195, repeats that same four panel, two series pairs then parallel layout on a third independent controller. Add it up and the X-195 tops out at 1,240 watts across three controllers, while the Sport series and the X-145 top out at 740 watts across two.
The series pairs then parallel approach on the 125 watt panels isn’t arbitrary, and it isn’t just about staying under the controller’s voltage ceiling. There are three separate reasons it’s built this way instead of one long series string or one big parallel bank:
- Voltage headroom in cold weather. Wiring all four into one long series string would put the summed open circuit voltage close to 95.5V at room temperature, and Go Power’s own installation documentation requires applying the NEC 690.7 correction factor (1.25x) to that number for code compliant sizing, which would push a straight four panel string uncomfortably close to, or over, either controller’s input ceiling on a cold morning when Voc is highest.
- Shade tolerance within the array itself. If all four panels were one series string and a roof vent or the A/C unit throws a shadow across even one of them, the whole string’s output gets bottlenecked down toward whatever the shaded panel can produce, since current in a series string can’t exceed the weakest link. Splitting the four panels into two independent parallel pairs means a shadow on one pair only costs you that pair’s output, the other pair keeps producing at full potential.
- Lower wiring losses than straight parallel. Running all four panels straight in parallel instead would quadruple the current at low voltage, meaning heavier gauge wire and more resistive loss over the run from roof to controller. Two panels in series first roughly doubles the voltage and halves the current compared to running everything in parallel, so the array gets lower current losses without stacking enough panels in series to risk the voltage ceiling.
It’s also simply the configuration both Victron and Go Power show as their own recommended layout for arrays this size in their installation documentation, not something Imperial Outdoors improvised.
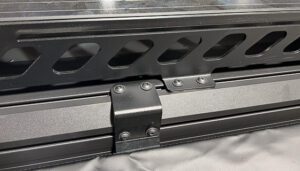
The mounting matters here too, and it’s not just a wiring story. Every panel across every stage bolts to Imperial Outdoors’ own roof rack, and the roof rack itself attaches to the trailer through the aluminum T-track extrusion that already bonds the roof panel to the wall panels structurally. That means the entire array, rack included, goes on without a single extra fastener punched through the roof skin itself, which is one less set of potential leak points on a part of the trailer you really don’t want leaking. The rack holds the panels roughly 4 inches above the roof surface, measured top of panel to top of roof, which opens up airflow underneath the array and helps keep panel temperature down, and panel output drops as cell temperature rises, so that airflow is a real lever on output on a hot, high sun day, not just a mounting detail. The panel-to-rack hardware has also been upgraded from earlier model years for a more secure, durable mount. The payoff of building the rack this way is coverage: Stage 2 on the shorter 145 length trailers, and Stage 3 on the X-195, get the array close to full usable roof coverage with no wasted gaps between panels, a cleaner install than the scattered panel-and-open-roof layouts common on competitor trailers.
Why each array gets its own controller instead of sharing one
Both Victron and Go Power’s own documentation illustrate the same underlying reason Imperial Outdoors splits every stage onto its own independent MPPT controller rather than running the whole roof through one larger unit. An MPPT controller hunts for a single best operating point across whatever’s wired to it. When part of a string is shaded, whether that’s the A/C unit, the bath vent fan, or a tree branch at a campsite, the shaded cells act like a bottleneck and can drag down the output of the entire string behind that controller, not just the shaded panel’s own share of it. Go Power’s own installation manual shows exactly this failure mode, a series string with sections at 40 percent, 30 percent, and 20 percent output creating multiple competing power peaks that a single controller has to sort through.
Splitting the roof into two or three independently controlled arrays means a shadow, or a fault, on one array doesn’t touch the others. If a controller ever fails outright, you’re down to two thirds or one third of your solar capacity instead of zero. It’s more hardware and more wiring runs than a single large controller would need, but on a trailer that’s going to end up parked under trees, next to another rig, or with a Starlink dish or roof vent casting a shadow across part of the array at some point in its life, independent controllers per array are a meaningfully more resilient way to build the system.
The controllers: Victron on Xplore, Go Power on Sport
The Xplore series runs a Victron SmartSolar MPPT 100/30 on every array, which fits naturally since Xplore already ships with a full Victron power system as standard equipment, including the Cerbo GX and GX Touch Display. The 100/30 is rated for 30A of charge current and up to 440 watts of nominal PV input at 12V, with a peak conversion efficiency Victron rates at 98%. It runs an adaptive, multi-stage charge algorithm, bulk, absorption, then float, adjusting charge voltage and current automatically as the battery fills. It has Bluetooth built in and pairs directly to the free VictronConnect app with no separate dongle needed, giving real time solar and battery voltage and current plus up to 30 days of history, and because the Xplore’s GX Touch Display and Cerbo GX are already standard, all three of an X-195’s controllers report into the same single screen instead of needing to be checked one at a time.
The Sport series runs a Go Power branded MPPT controller (Dometic’s current SC-DB-MPPT-30, the successor to the older Go Power GP-RVC-30-MPPT unit Imperial ran previously), one per array. It’s rated for 30A of charge current with up to 600 watts of nominal PV input at 12V, meaningfully more headroom on that spec than the Victron unit, which matters because Stage 2’s 500 watt panel addition sits comfortably under that 600 watt ceiling rather than pushing right up against it. Go Power rates its conversion efficiency at up to 98% and its MPPT tracking efficiency, a separate measure of how precisely the algorithm locks onto the true peak power point rather than a nearby approximation, at up to 99.9%. It runs a four stage charge cycle, bulk, absorption, float, and an optional equalization stage for battery types that benefit from it, and it supports two independent battery outputs, meaning it can maintain a second battery bank, useful if a Sport owner wants to trickle charge a chassis or accessory battery in addition to the house bank, not just the primary. It connects to Dometic’s RV-C network and pairs with their optional PowerTrak display and the Go Power! Connect app for the same kind of real time monitoring the Victron system gives Xplore owners.
Compared to the previous GP-RVC-30-MPPT that Imperial Outdoors ran on the Sport series before, the core charging numbers are similar, 30A of charge current and the same 600 watt PV input ceiling at 12V on both. Where the new controller actually gets better is the operating envelope around that charging: rated operating temperature widens from -35°C to 45°C on the old unit to -40°C to 55°C on the new one, meaning it holds full rated output over a wider range of hot and cold before the controller has to start derating itself, and the altitude rating goes from 3,000 meters up to 4,000 meters. The new unit’s documentation also explicitly lists PV overcurrent and reverse current protection alongside the reverse polarity and overvoltage protection both units share. One spec actually went down slightly rather than up: max panel input voltage is 96V on the new controller versus 100V on the old one, which is why the series pairs then parallel wiring described above, and the NEC correction factor Go Power’s manual calls out, both matter more now than they would have on the older unit.
Neither controller lives out on the roof with the panels. Both are rated for protected, indoor mounting (the Go Power unit carries an IP32 rating and Victron’s documentation calls for a dry, ventilated indoor location), so on both series the controllers themselves are mounted in a protected compartment near the battery bank, with only the panel wiring running up to the roof.
What it can actually power
The two loads worth budgeting against are the fridge, because it’s cycling around the clock, and the 12V air conditioner, because it’s the single biggest DC draw on the trailer.
Fridge draw depends on the model. The Isotherm CR195 (X-195 and S-195) pulls about 6A at 12V while the compressor is actually running and averages around 840 watt-hours a day. The Isotherm CR85 (X-145) has the same instantaneous draw but a smaller box to cool, averaging closer to 380 watt-hours a day. The Isotherm Freeline Slim 140 (S-145) runs about 70 watts while cycling and averages around 450 watt-hours a day. Those averages come from the manufacturer’s own testing at a 25°C ambient, so a hot climate or a lot of door-opening will push the real number higher.
The 12V air conditioners are a bigger story, and worth putting in context against what a traditional RV rooftop AC actually requires. The Dometic RTX2000 on the Xplore runs directly off 12V DC, no inverter required, and is rated at 6,824 BTU of cooling from a 650 watt input, drawing around 19.5A DC in normal operation and up to 29A DC on Boost mode (a 20 minute max-power quick cool cycle). It uses a variable speed, inverter-driven compressor rather than a simple on/off unit, runs across four modes (Boost, Auto, Eco, and Manual), and weighs about 73 lbs at a 6.6 inch installed height. Compare that to a traditional 120V rooftop AC in the “Penguin” style found on a lot of conventional travel trailers: roughly 11,000 BTU, but it needs a dedicated 15A circuit, a proper inverter to run off battery power at all, and realistically a generator (something in the 2,200 watt class) to run for any real length of time off grid. It’s also physically much taller, over 10 inches versus the RTX2000’s 6.6 inches, which matters for both road clearance and how much wind resistance and roof weight you’re carrying at highway speed. The Velit 2000R Mini on the Sport series is the same category of unit, rated at 7,500 BTU and 600 watts at 12V with operating current running 15A to 50A depending on fan speed and mode, direct-wired the same way, no inverter in the loop.
Neither 12V unit is something solar is meant to run outright, even at Stage 3. What solar buys you there is reducing how much of that draw comes out of the battery bank and how fast the bank recovers once the AC cycles off, on top of everything else on the DC side that solar is easily covering. Running the numbers on a reasonably sunny day, figuring around five hours of strong, mostly unshaded sun and knocking off roughly 15 to 20% for real world losses in the wiring and the MPPT conversion itself:
- Stage 1 (240W) works out to somewhere around 950 to 1,000 watt-hours a day, comfortably covering the CR195’s 840 watt-hour average with room left for lighting, the water pump, and charging phones.
- Stage 2 (740W) works out to somewhere around 3,000 watt-hours a day, clearing the fridge load easily and starting to meaningfully offset AC runtime.
- Stage 3 (1,240W) comes out to somewhere in the 5,000 watt-hour range, enough to cover the fridge, the DC essentials, and several hours of AC on Eco or Auto mode, though a stretch of Boost mode or a hot afternoon of steady cooling will still draw the battery down faster than any of these stages replace it in real time.
None of this is a guarantee, it moves with season, latitude, shade, and how full the battery already is when the sun comes up, but it’s a realistic starting point for sizing what you actually need out of a given stage.
Stage 1 and Stage 2 are available on the Sport series (S-195 and S-145) and on the X-145. All three stages are available on the X-195. You can see the full solar and battery options laid out on each model’s page, or run them side by side on Compare Models. If you want to see one of these systems in person, your local Imperial Outdoors dealer can walk you through it on the roof, Z-brackets and all.